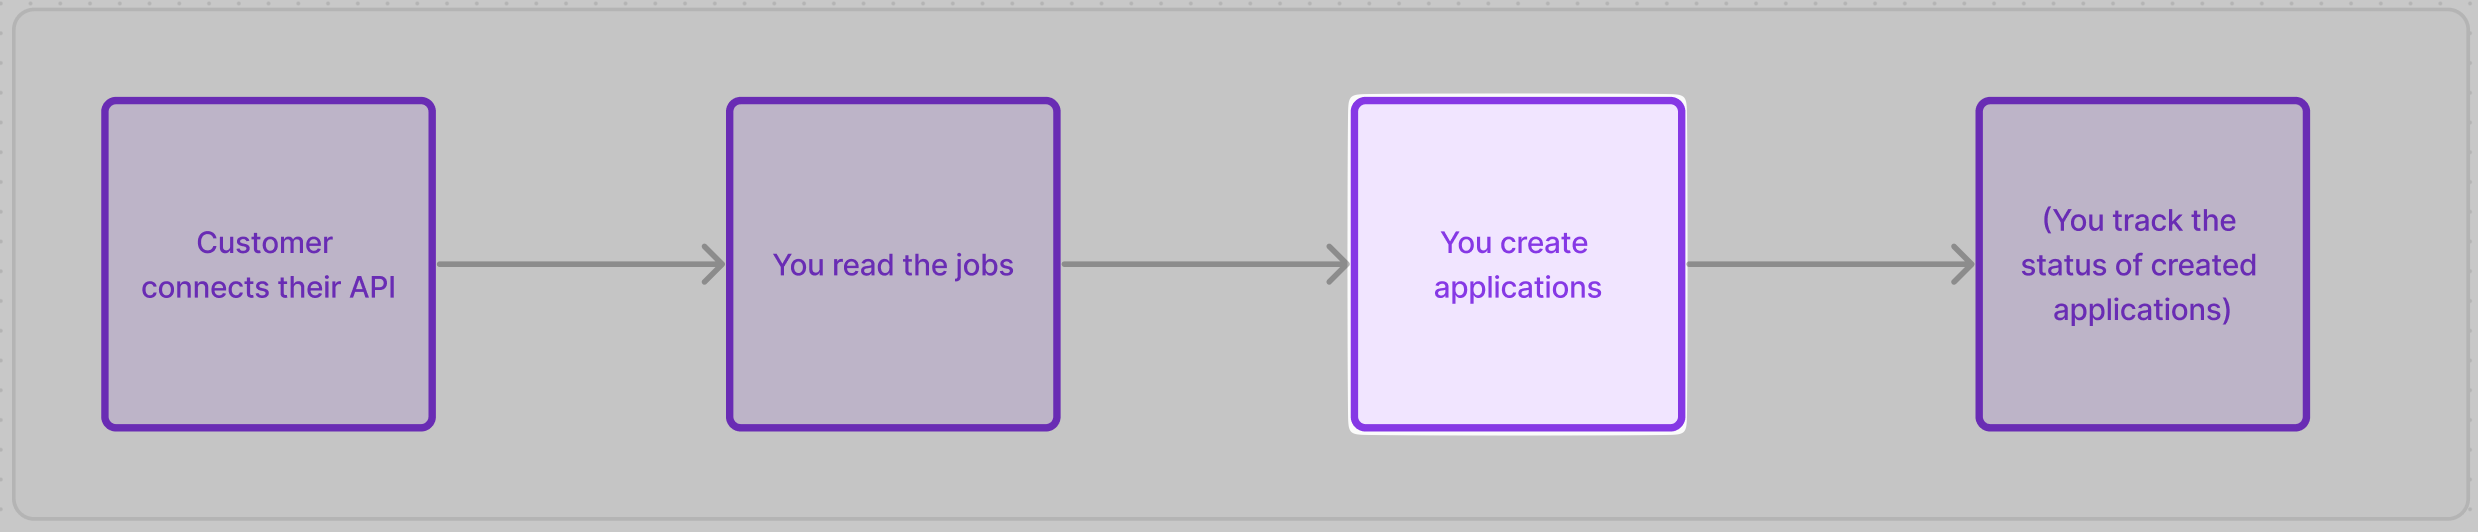
Create a candidate for the application
When using Kombo’s “Create Application” endpoint you don’t have to handle the logic of creating a candidate for the application. We already automatically handle it in the following manner:- If there is no candidate in the system for a given application, we will automatically create a new candidate
- If there already is a candidate in the system that matches with the application, we will attach the application to the candidate
Set the source of the application
When creating an application you want to let your customers know that this application is coming from you. Otherwise, they won’t know how many of their hires were because of your candidates and therefore how much value you created for them. Our “Create Application” endpoint will automatically set the source of the candidate for you on every created application (see more here)🦉 Most ATS set the source on the candidate level (not the application level). If you are creating an application for a candidate that has existed in the system before, we won’t override the source.
Upload attachments with the application
You can upload any number of attachments to an application via theattachments array in the request body. The first CV in the attachments will be treated as the resume of the candidate when the tool allows previewing a resume.
There are two ways to submit the document that will be uploaded:
- as a base64 string: you can encode the attachment and put it into the
attachments.[*].datafield. This will cause your requests and logs to be quite large, though. - via a download URL (recommended): if you don’t want to work with large base64 strings, you can provide a download URL to the
attachments.[*].data_urlfield.
data and data_url at the same time.
We recommend that the summed up size of all attachments that are submitted with an application should be below 10 MB, as this is within the file size limits of most ATS.
Error Handling
Creating an application can fail for various reasons. The API returns structured errors with specificcodes to help you handle each scenario appropriately:
Retry behavior
We have implemented retry logic on our side with each underlying tool (e.g Personio, SmartRecruiters, etc). That means we’ll retry errors with status code429, any 5xx error and if we get no response at all from the tool.
Therefore, please only retry requests with certain error codes that are safe to retry.
Write answers to screening questions
If you want to submit the answer to a screening question to the ATS you have to first read the questions that are asked per job. You will get this info by having the “Read screening questions” scope enabled in your scope config.
Screening Question Formats
Please find a description below of the type as well as an example of each:Screening questions formats and examples.
Screening questions formats and examples.
screening_question_answers array, like so:
screening_questions[*].required == true) and force you to submit an answer if you want to create an application. We let you know about some of the workarounds in our guide on customer-specific edge cases.
Handle ATS-specific limitations
Some ATS don’t support certain features such as screening questions. You get this information via the coverage grid or the “get tools” endpoint that will show you the supported data models, write actions and features via thecoverage object:
Required fields
Before you go live with your first customer, there are a few things to look out for to make the connection go as smoothly as possible.Handling required screening questions
As mentioned in the “screening questions” section when creating applications, some ATS force you to submit the answer to a given question and will reject any applications that don’t have answers attached. This won’t be a problem with a lot of questions but some will have therequired: true boolean set, so watch out for those.
- Collect the answers: You can implement a frontend component that dynamically renders a form based on the Kombo API response. The candidate can then submit the actual answers to screening questions and you can submit them to the ATS. While this would sure be the cleanest solution, some of our customers don’t want to implement this because it violates their idea of a one-click-apply solution or takes too much engineering capacity.
- Ask the customer to remove questions: if you don’t want to collect the answers to screening questions, you could ask your customer to remove these questions.
- Clearly submit non-data: For most fields (except for dropdowns, numbers, and booleans) you can “auto-fill” some data that will make it clear to your customer that this is not an actual response from the candidate. For example, submitting an empty string or “-” for text fields, submitting a date that is very clearly in the past, etc.
-
Implement customer-specific logic: A less scalable way is to implement custom logic for each customer that either hard-codes data points or dynamically maps them based on other data of the candidate. This approach is sometimes the most pragmatic solution if you have a low number of customers that require screening questions, however, it’s not very scalable with a large number of customers in production.
- Agree on preset answers: When onboarding a customer you can share the problem of required screening questions with them and agree together on a number of fixed answers for all/the most common screening questions.
SuccessFactors
Application Templates & Screening Questions
Before connecting:
In SuccessFactors, customers can define “Job Application Templates” associated with their job requisitions. These templates include custom fields that may vary based on the requisition’s location. Applicants are required to complete these custom fields as screening questions upon submitting their applications. Kombo has the ability to process the templates, and to surface these fields to you as screening questions that you can then answer to successfully submit candidates to SuccessFactors successfully.It is advisable to verify with your customer whether they utilize Job
Application Templates and whether their templates include defined custom
fields. If it turns out that the Job Application Templates are utilised,
please follow the steps below after the connection has been established.
After connecting:
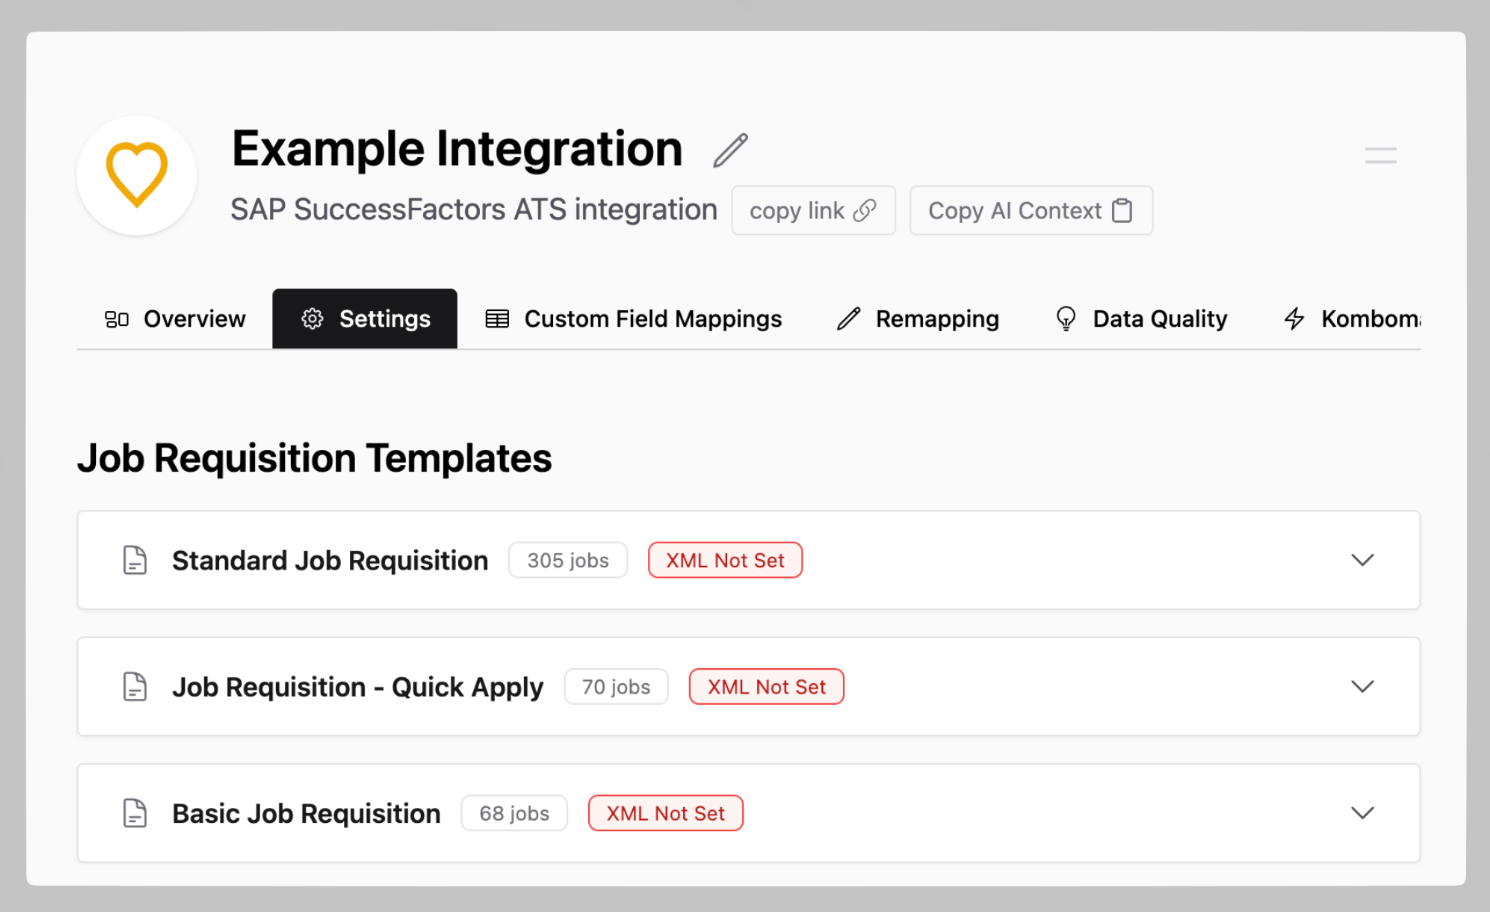
Once the connection to the customer’s system is established and the initial sync has finished, please follow these steps:- Export Job Application Templates from SuccessFactors: For detailed instructions, refer to our help center article:
- Upload Templates to the Kombo Dashboard: After the initial synchronization, navigate to the settings page of the integration and upload each template to its corresponding slot. Note: You likely only have to upload the templates for the jobs that you’ll need coverage for.
- Process the newly returned Screening Questions: We will utilize the templates to generate a list of fields as they are defined within the templates. We will then turn these fields into screening questions. This ensures that applications and candidates can be submitted successfully to SuccessFactors.