Implementation
Configuring the Filters
There are two ways to configure the filters: as part of the connection flow and as a standalone configuration.As Part of the Connection Flow
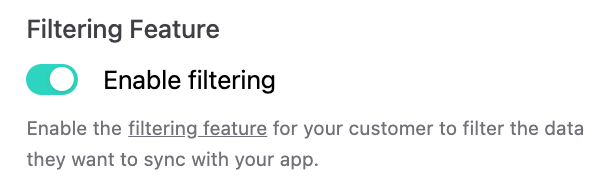
To enable filtering for a specific connection flow link, you can use the create connection link endpoint withenable_filtering set to true. Alternatively, you can do this in the dashboard by flipping the toggle in the connection link creation dialog.
SETUP state and remain there until the filters are configured or confirmed. If the connection flow is closed, you can reopen the old link, which remains valid until the filters are configured, or create a new provisioning link as described below.
Standalone Configuration
You can also offer the filtering configuration as a standalone feature to set up filters for your existing integrations or to update filters at any time. You can do this via API with the create provisioning link endpoint or in the dashboard at the bottom of any integration overview page.
Custom Fields
Many customers have custom fields that they want to use for filtering. Common fields includebenefits_eligibility, seniority_level, and team_name.
To enable filtering by custom fields, you must map the fields beforehand. You can also enable your customers to map the custom fields themselves using our field mapping UI
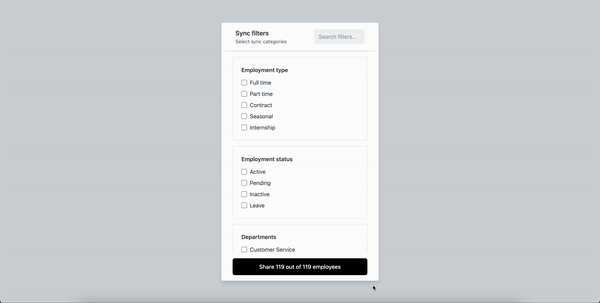
Active Filters
Once the filters are set, you can view and manage them on the integrations page of the dashboard.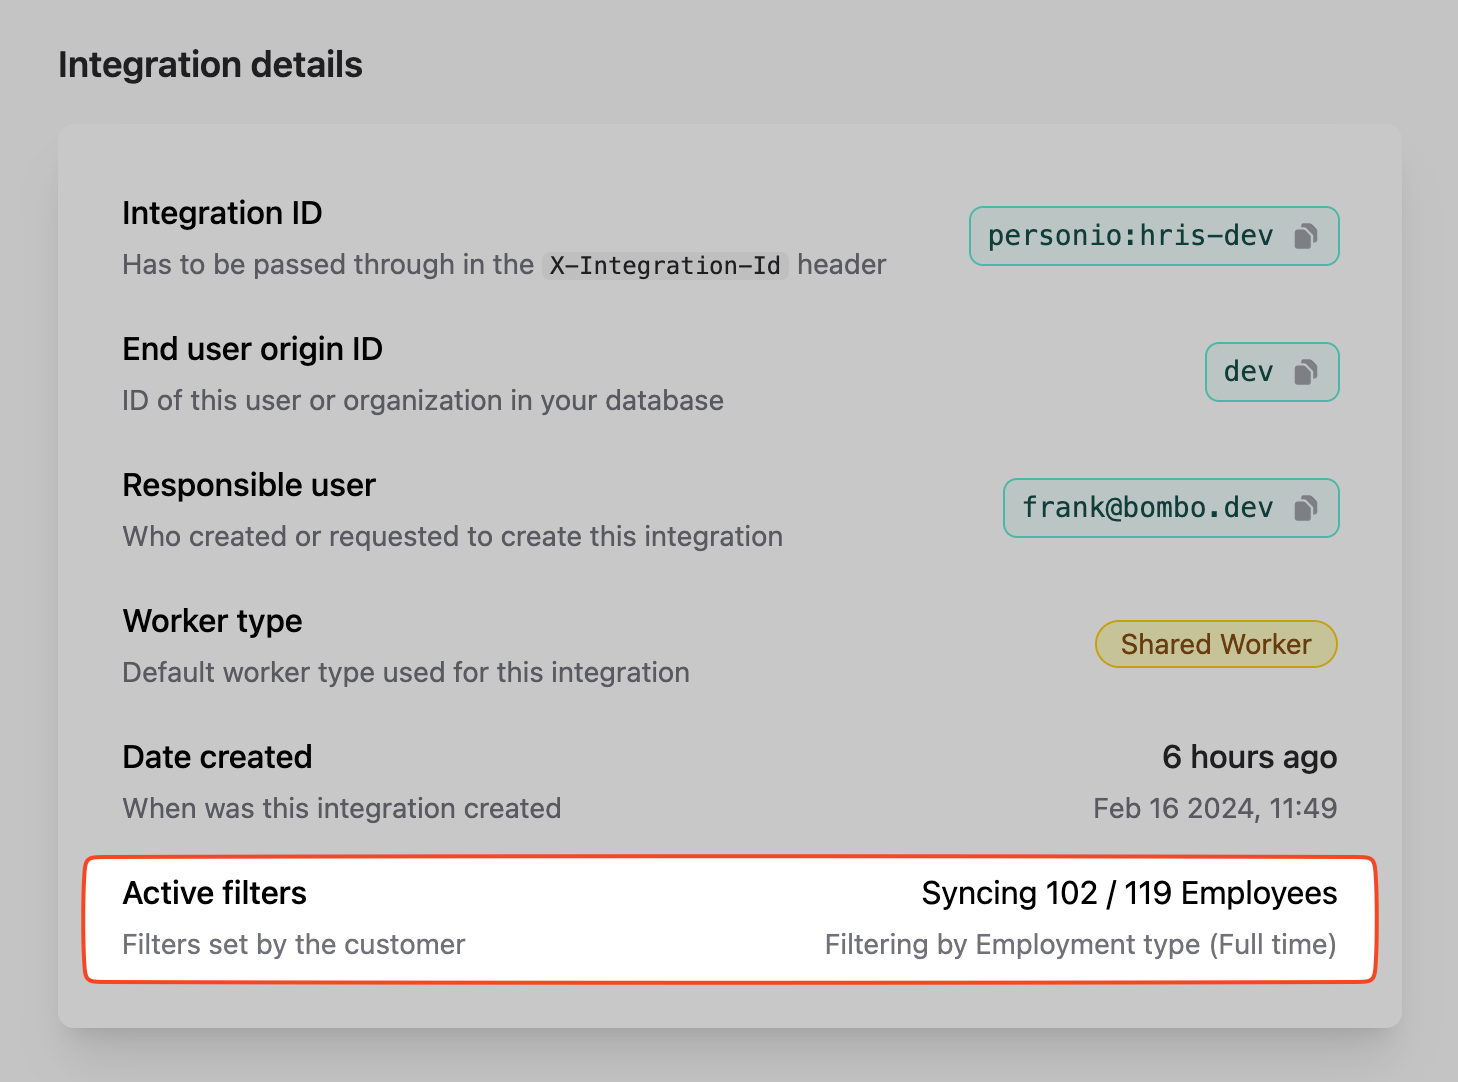
Querying the Data
After setting the filters, you can query the data through our API. Our employees, absences, and employments endpoints will return only the data that belongs to the employees matching the configured filters. However, we will still return all groups, legal entities, work locations, and teams, even if no employee belongs to them. The data is persisted as described here. We recommend setting up webhooks and reacting to finished syncs to get the filtered data back to your system. By using ourupdated_after and include_deleted query params, you can significantly decrease your ingress for big integrations. Employees that go out of scope are treated as deleted.