

1. What you do
Prerequisites
- Configure scopes. The exact data points Kombo requests. Keep them as tight as your use case allows. See Permissions and scopes.
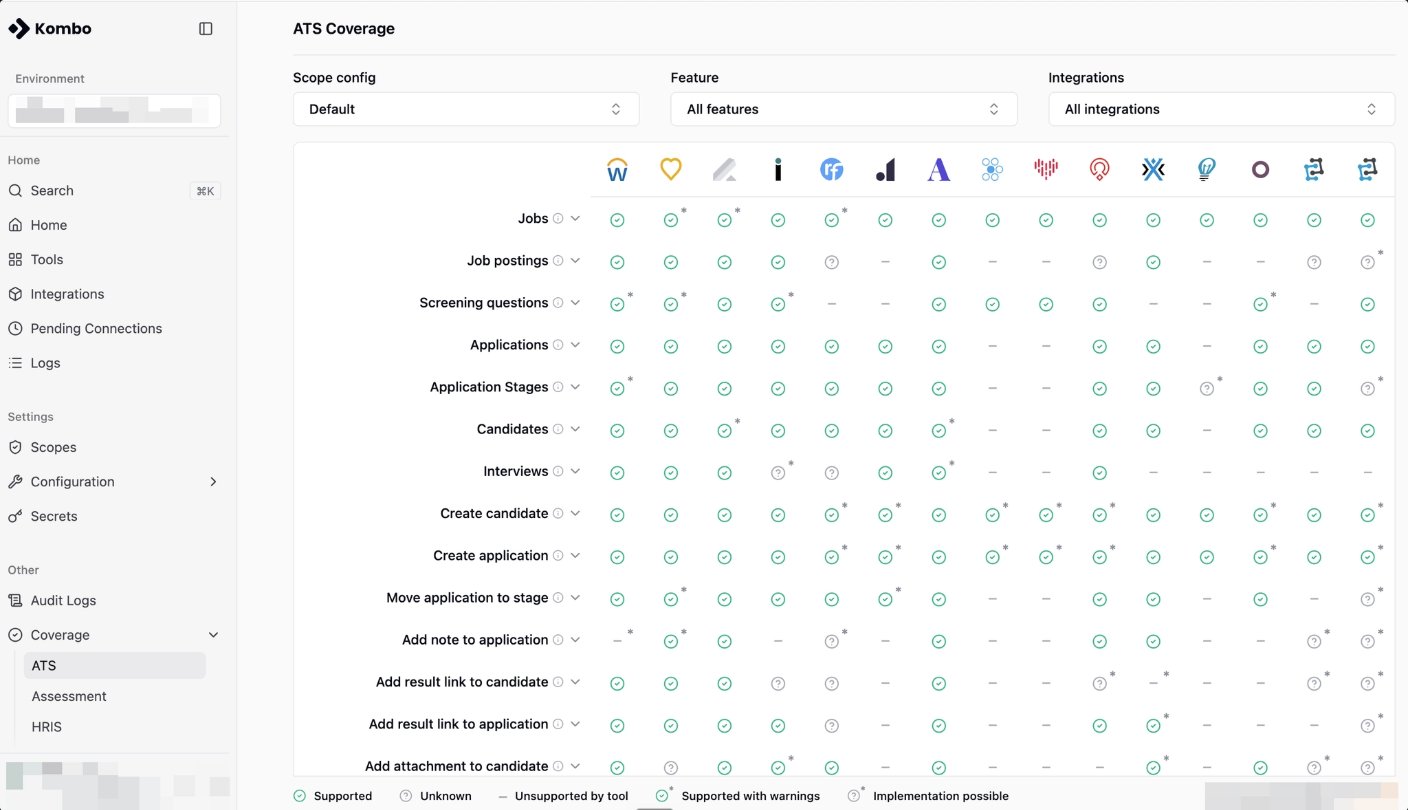
- Check coverage. Confirm the tool is supported and that it supports your use case on the coverage grid and tools page.
Checklist
-
Step 1 — Confirm the tool is enabled and read the limitations
- Open the Tools page and confirm the tool is enabled for your environment.
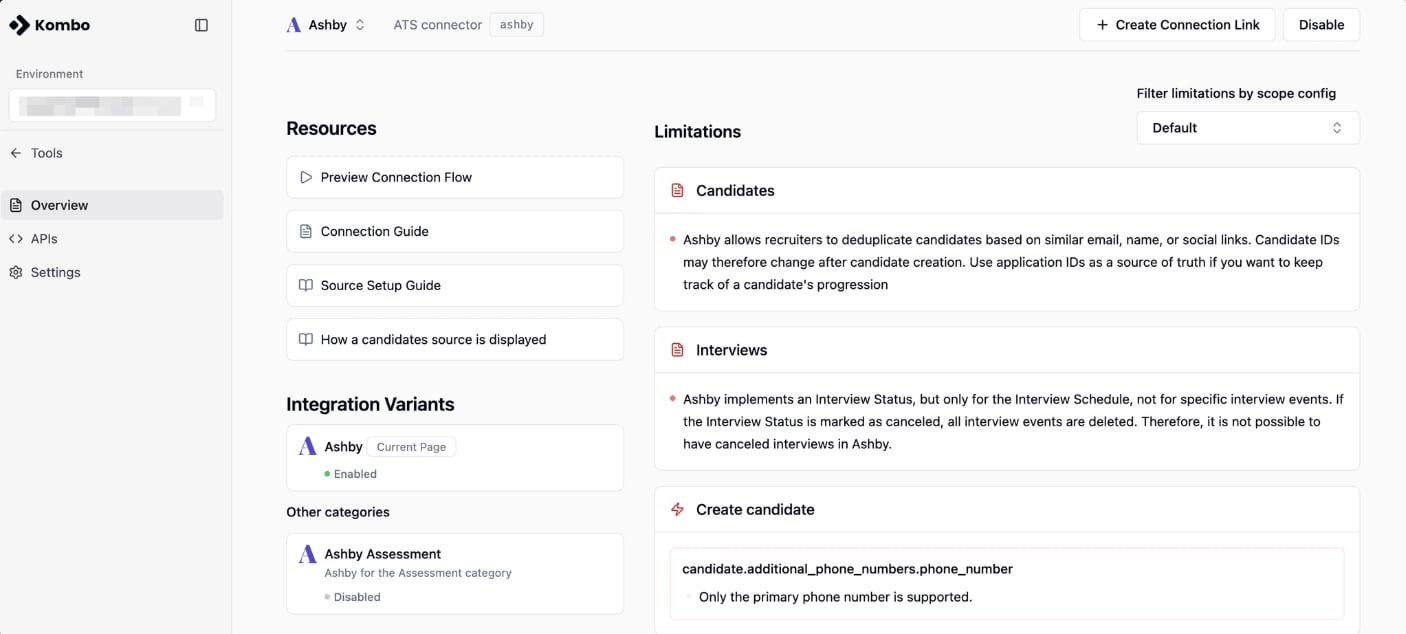
- Read the tool’s limitations before you invite the customer. Not every tool exposes everything through its API — some have partial APIs or need workarounds, and a few fields or write actions may not be available.
-
Use Coverage for a high-level overview (tip: filter by your scope).
-
Open the specific tool page for details, the connection flow, guides,
and other docs (tip: filter limitations by your scope).
-
Step 2 — Choose how your customer connects
For the engineering setup of the embedded flow, see Embedded flow.
-
Step 3 — Send the link (or point them to your product)
- Embedded flow: customer starts from your product.
- Connection link: send the link you generated in Step 2.
-
Step 4 — Monitor progress
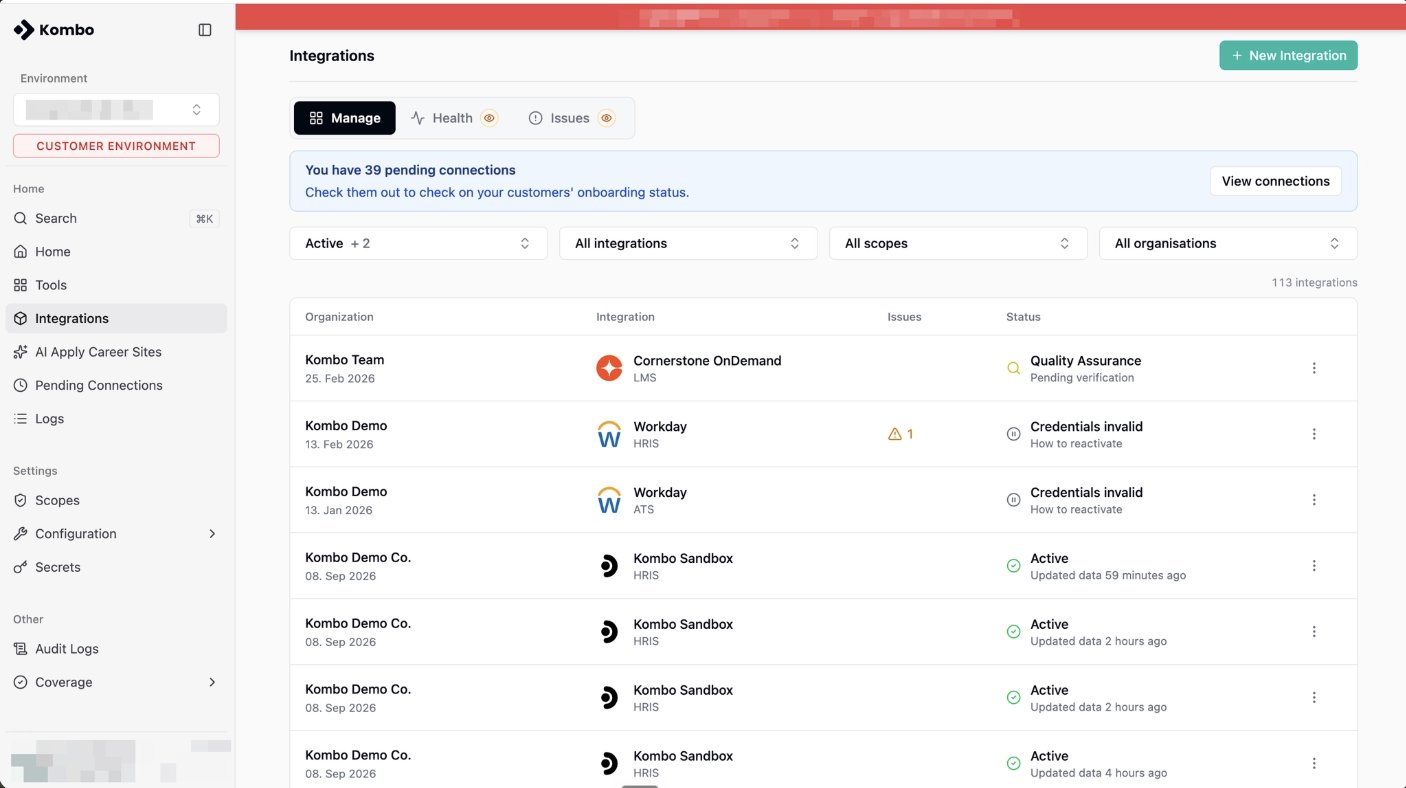
- Pending Connections — integrations that have not been started or finished.
- Integrations — successfully connected integrations (statuses can vary).
2. What your customer does
Prerequisites
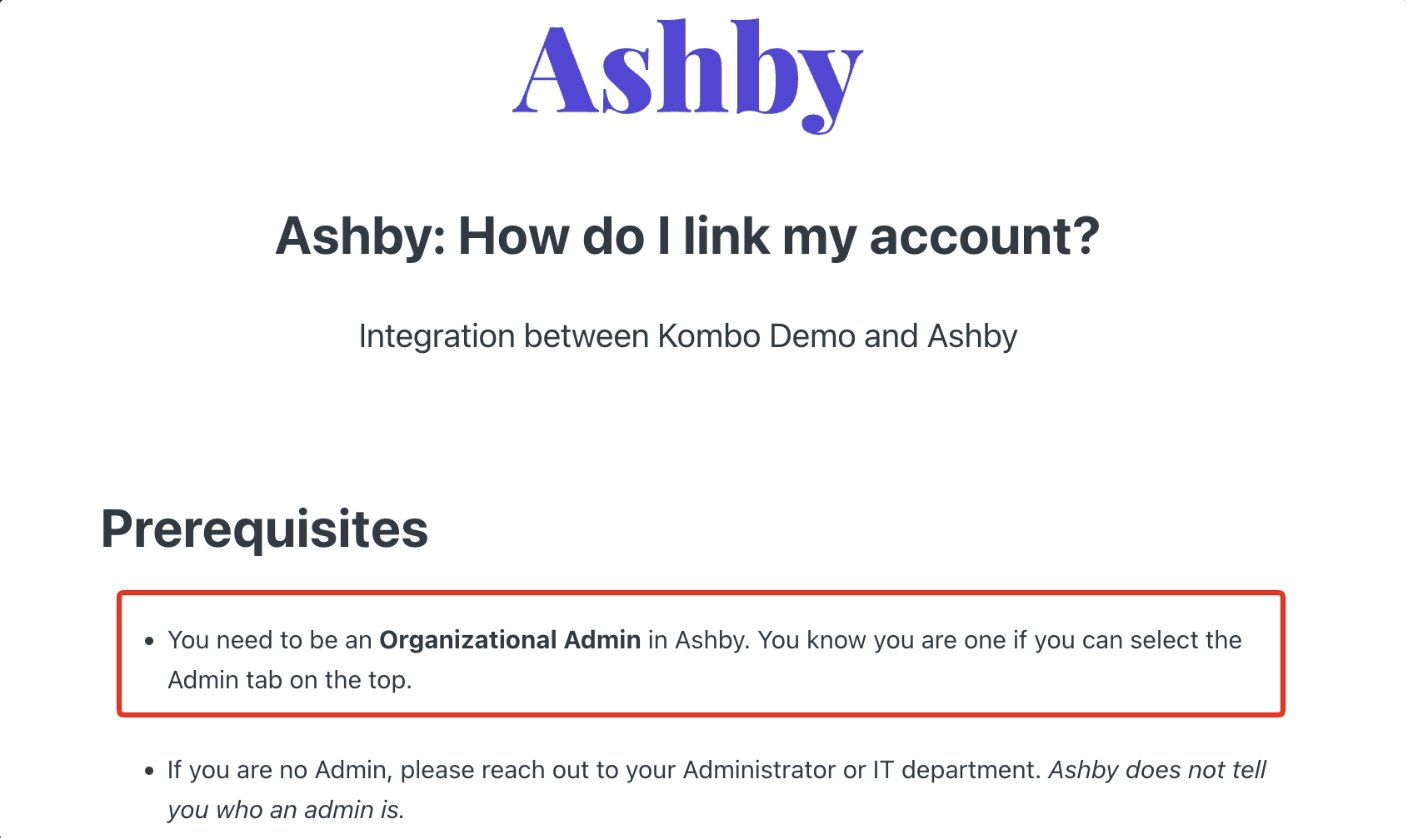
- The person connecting needs admin access. They must have the right admin level in their tool to authorise the connection and grant the requested scopes. This is generally an admin or equivalent.
Checklist
-
Step 1 — Open the connection
- They open the connection link you sent them.
- If Kombo is embedded in your product, they select their tool from there.
-
Step 2 — Follow the connection flow
- They review and approve the requested data (your scopes).
-
Step 3 — Authorise the connection
-
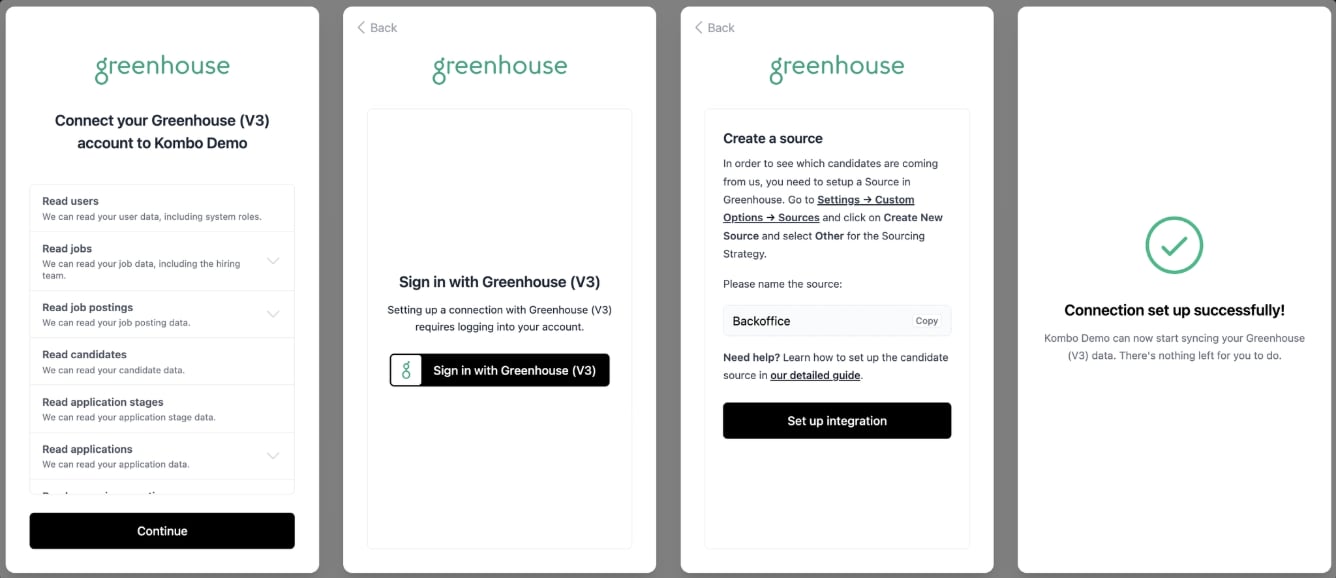
OAuth tools — they sign in and approve access, like single sign-on.
Nothing to create.
-
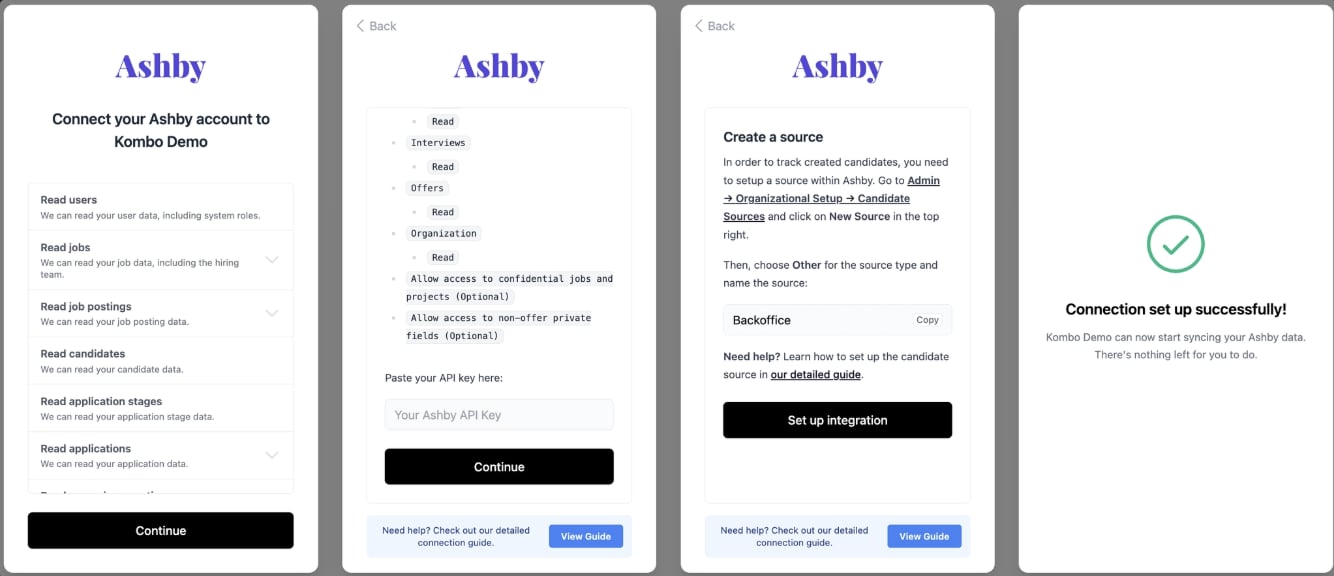
API-credential tools — they generate an API key (sometimes a secret)
inside their tool and paste it in.
-
OAuth tools — they sign in and approve access, like single sign-on.
Nothing to create.
-
Step 4 — Confirm success
- When the integration is successful, no further action is required from your customer.
Enterprise customers and enterprise tools
Enterprise customers generally use enterprise systems (for example Workday, SuccessFactors, Oracle). These tools often require more time and steps. Treat them as guided launches, not self-serve.
Checklist
- Prepare for security questions — Expect questions about data security and access. Keep scopes tight and be ready to explain exactly what you request.
- Line up the right person early — They need admin rights and the ability to set permissions. This may be someone you are not yet speaking with.
- Run through the process with your customer — Enterprise tools often gate data behind specific permission areas. Know those requirements before your customer hits them in the flow.
Connection stuck or not completing?
See Troubleshoot connection flow problems for statuses and the most common issues.Related docs
- Onboarding your customers — Connect flows, invite links, and rollout
- Connection guides — Per-tool setup instructions
- Permissions and scopes — Request only the data you need
- Embedded flow — Implement Kombo Connect in your product
- Best practices — Scopes, syncing, and error handling