What is a custom field, and when to use it
All HR systems are inherently limited in the number of standard fields they can offer. This can become a problem if your product relies on additional information, which is not standard across all tools. Initially, HR systems started adding an increasing number of standard fields to their systems. This quickly became a problem, and as the number of fields grew to hundreds, the systems became hard to maintain. Custom fields are a way to solve this problem. They allow users to add new fields to the standard data model. By now, most HR systems have adopted this concept and offer custom fields.Custom fields are for reading additional data from connected systems.
Looking to write extra data when creating candidates or applications? See
Remote Fields. For a full comparison of
all extension mechanisms, see Extending the Model.
How to use custom fields in an HR system
We offer a simple way to read custom fields from your HR system. The first step is to set it up in your system.Personio
Let’s take Personio as an example: Under Settings > Employee Information, you can easily add new attributes or entire sections to your employee profiles. We will add a new attribute called “Favorite Color” to the “Public Profile” section.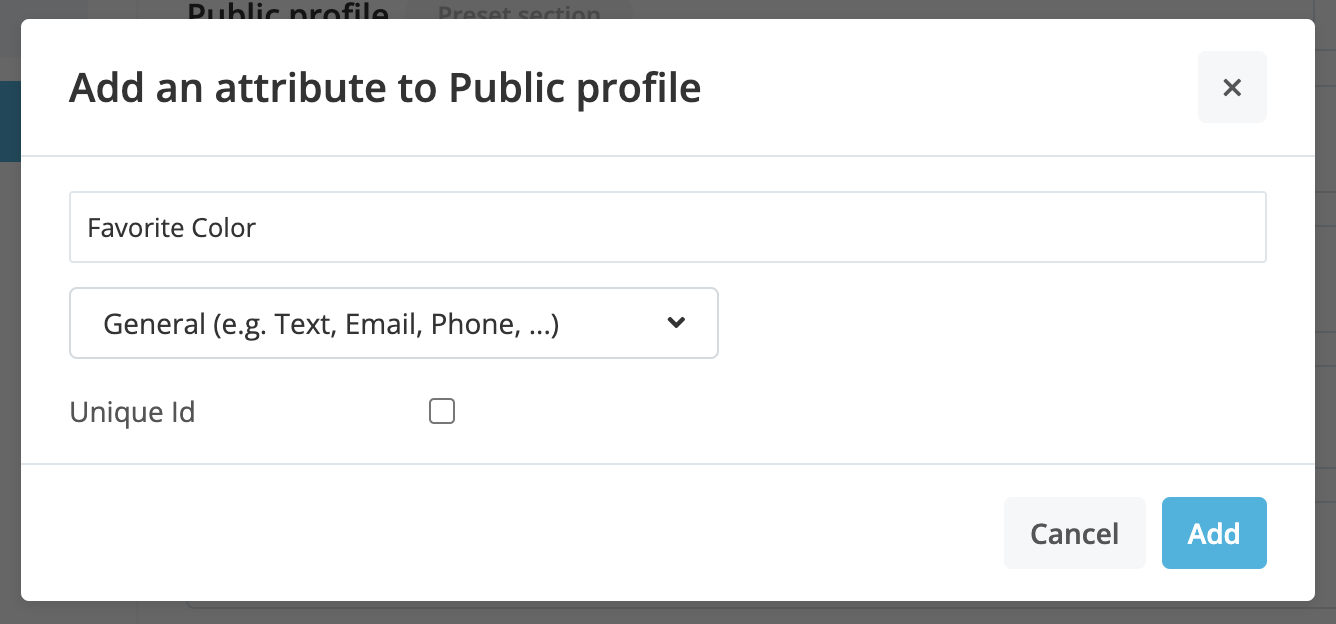

Setting up custom fields in Kombo
Before we set up the custom field in Kombo, let’s talk about how you will receive the data.Data format
Each model that supports custom fields has acustom_fields attribute. This attribute is a JSON object that contains all custom fields.
You can define a name for the custom field in Kombo, which will be used as the key in the JSON object.
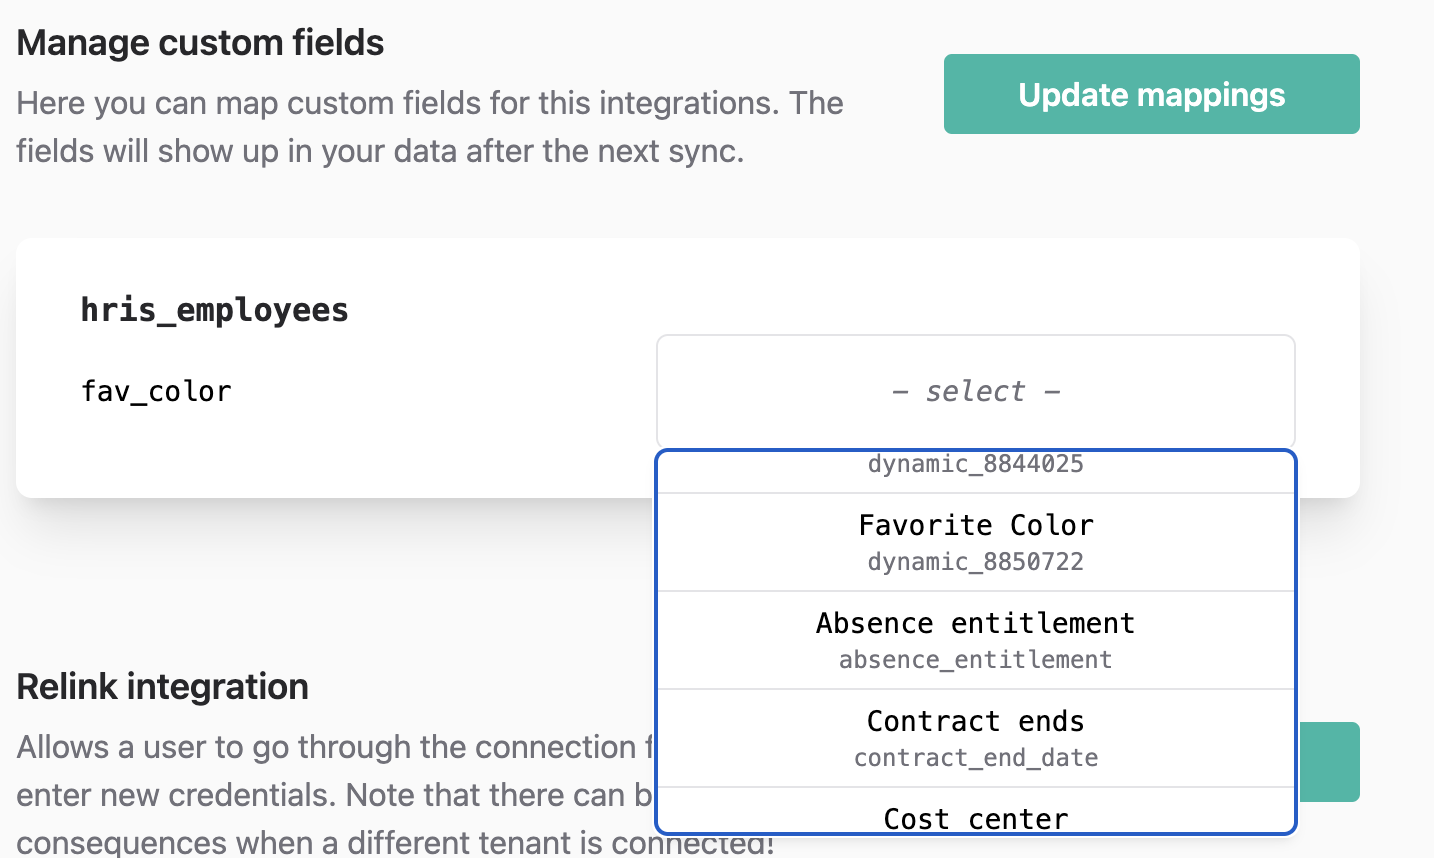
You can then map any property from an integration to that custom field in Kombo. This allows you to unify the data across different integrations.
Let’s say you have a customer with a custom field called “Favorite Color” and another customer with a custom field called “Favourite Colour”. You can map both of them to the same custom field in Kombo so that you can always access the data in the same way.
Setting up the custom field
Open the Dashboard and click on “Configuration” in the sidebar, then on the “Custom Fields” tab. There, you can create a new custom field. Let’s call it “fav_color”.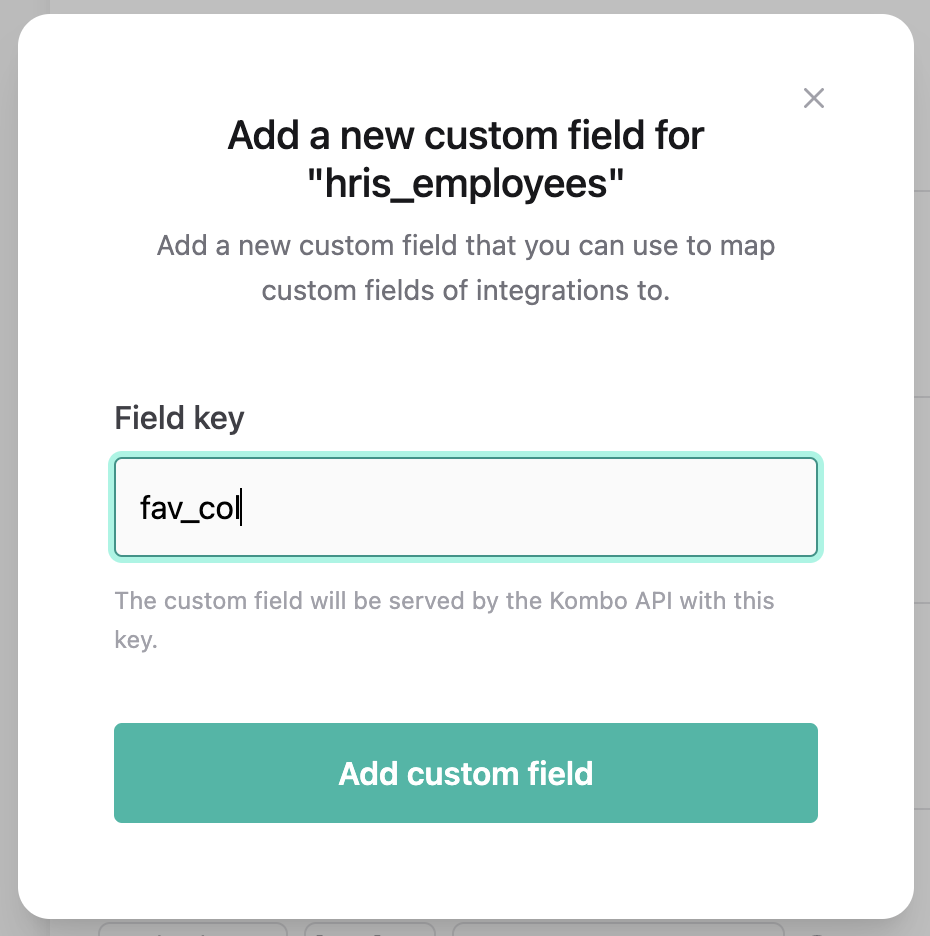

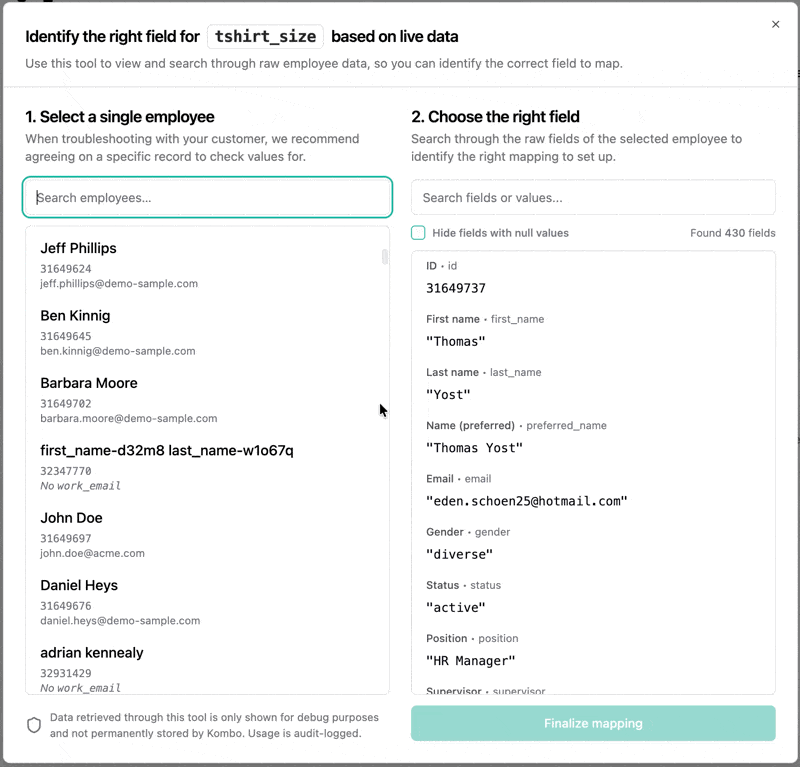
Custom Field Explorer
Self-Serve Custom Field Configuration
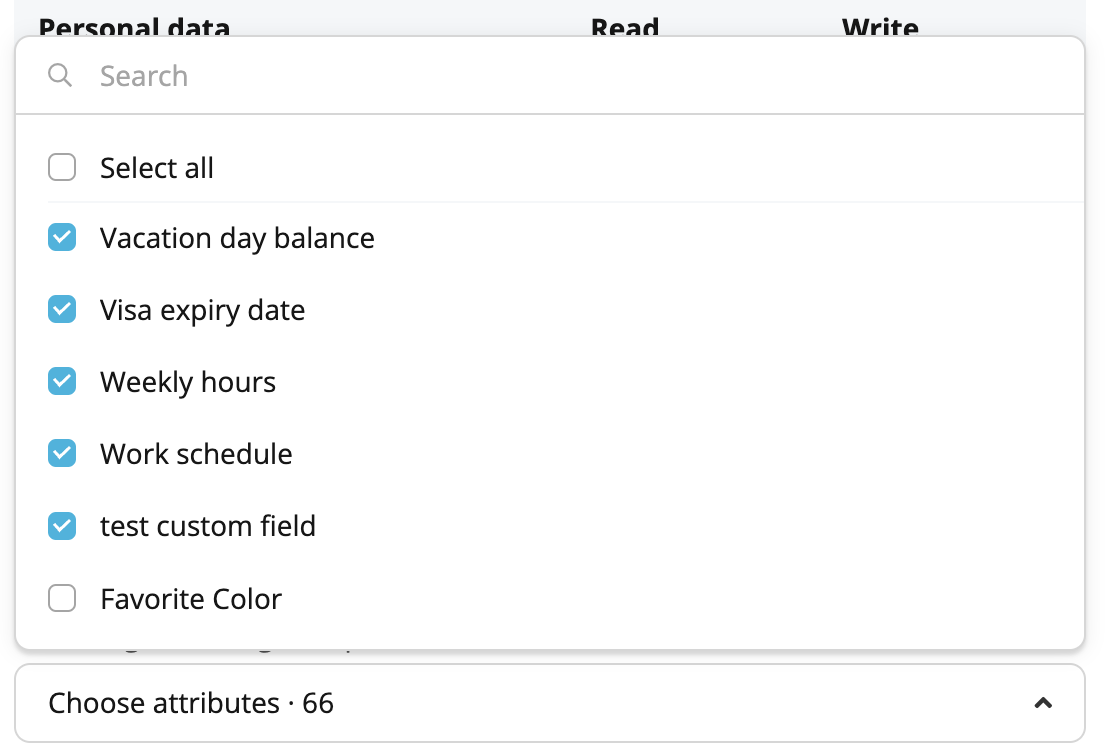
To simplify the custom field mapping process, you can allow your customers to map custom fields themselves using our self-serve Setup Flow. Custom fields can be mapped as part of the connection reducing the need for manual setup. Learn more about enabling self-serve field mapping here.Accessing custom fields in the API
When you query the API, you will receive any mapped custom field values in thecustom_fields attribute. In this case, we query the GET /employees endpoint.
The value of a custom field mirrors what is returned by the underlying API (i.e. it’s not always a string but can be a number or even an object too).